[QUOTE=WayneC] [QUOTE=crowduck]
Wayne,
Can you give a description of how you built this router sled, the parts used, and sources? Looks pretty slick.
CrowDuck [/QUOTE]
Chris,
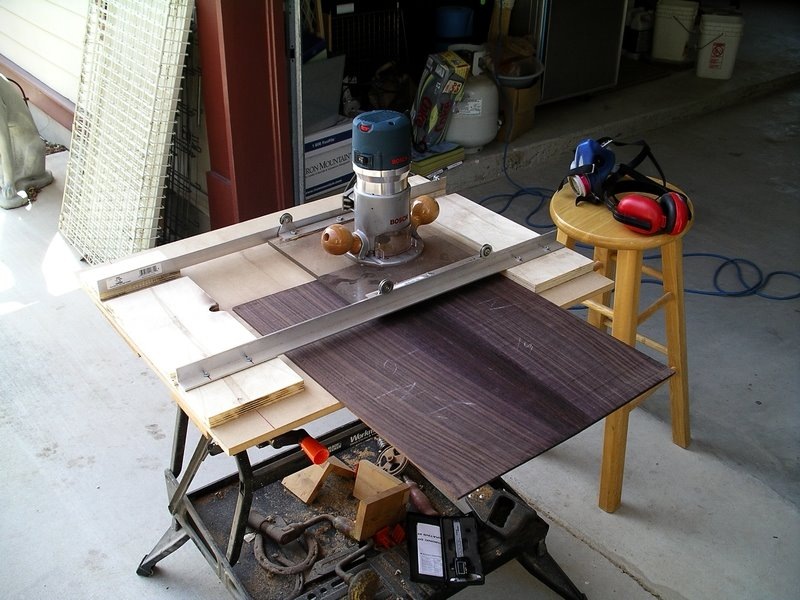
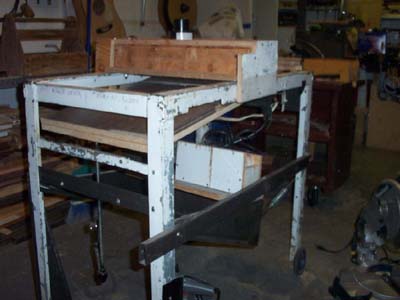
The sled is pretty simple. The base is a piece of 1/2" MDF about 20X30" (big enough to place a joined back or top on it)and a couple of 3/4" plywood scraps. The rails are two 1" aluminum angles from Home Despot.
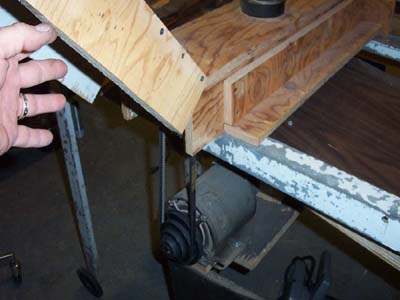
For the sled part, I got a piece of acrylic from the local Woodcraft store to mount the router on. They sell them as router baseplates. I cut a couple of 6" pieces of the aluminum angle and bolted that onto opposite edges of the acrylic piece. The rollers are bolted to the angle pieces and ride on the rails. I found the rollers in the screen door / sliding door repair aisle at Lowes. Home Depot had some plastic ones, but Lowes had metal-with-bearings and I thought those would be smoother rolling.
My router came with a detachable base which I bolted to the sled. Total cost of materials for the whole thing was less than $30. I will probably add some hold-downs in the future to help hold the wood flat to the base.
There are two downsides I experience when using this thing. The first is that I don't have dust collection on it, so I have to use it outside. The second is that when using a straight router bit, the bit leaves tool marks on the wood. I'm going to try a 1/2" downcut bit to see if I get a cleaner cut. As it is, I use this thing to get to within ~0.01" of my final thickness then switch to my RO sander and scraper to remove the last bit of wood along with the tool marks. [/QUOTE]
Wayne,
Thanks for details, I like that alot! If you don't mind a suggestion, how about this to 'hold down' the stock. Drill holes in the MDF base, and on its underside build a shallow sealed box with a connector to a shop vac, and make it a vacuum table.
And, could a Wagner Safety Plane be used in a router rig like this, instead of a router bit? I've only read of it being used on a drill press, buy why wouldn't it work in a router? I've never used the Wagner, and am a newbie, so maybe it's a dumb question. Would it be dangerous? I'm guessing I'd need a large, heavy router for stablilty.
CrowDuck
|